
I’ve done quite a bit of travelling this year and have documented much of it with my Fujifilm Instax camera. However, when I got back, I had no idea how to display them! In my opinion, pinning them up can sometimes look a little messy.
My bedroom wall is filled with black photo frames, it’s kind of a feature wall, if you will, so I somehow wanted to incorporate them into this.
What you will need:
- Photo frames (The ones I used were 5 x 7.)
- Coloured card (I used grey, but you can use whichever colour you prefer.)
- Instax photos (This will also work for normal photographs, but you will need a bigger frame)
- 1 sheet of white A4 paper
- Glue
- A Pen
- Scissors
First, I selected the photos I wanted to display. The 5 x 7 frames fit two Instax pictures comfortably, with room for a label. However, if you want to display more than two, I would suggest using a bigger frame.

Taking apart my photo frames, I used the glass to measure how much card I would need.
I played around with the layout and made a label for the different locations using the A4 paper.

Stick everything onto the coloured card and simply put the frame back together.
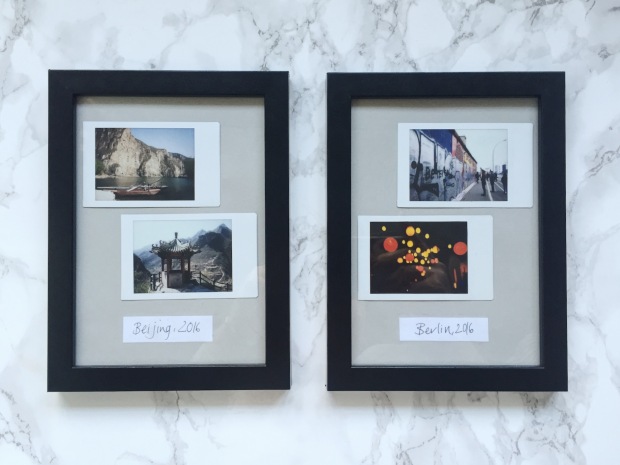
The final thing to do is to display them!

P.S. If you don’t own a polaroid camera or Instax, but you’re still a fan of that style of photo, a good app to use is LaLaLab. You can upload pictures from your camera roll to the app and there’s the option to print them in the polaroid style. They’re reasonably priced and they always have discount codes and offers!
However, these are square photos and much larger than the Instax, so if you’re using LaLaLab or similar, you will need a bigger frame if you want to display more than one! Here’s a side by side comparison:

Instax (left), LaLaLab (right).

Lovely idea!
LikeLiked by 1 person
Thank you! 😊
LikeLike